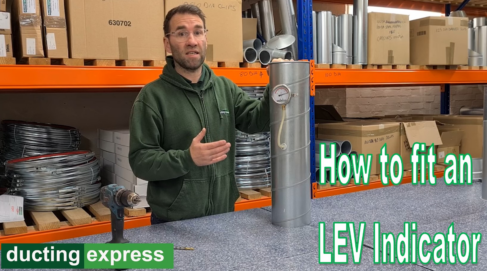
What is an LEV indicator?
LEV indicators help to ensure businesses that their extraction systems are working & safe. They provide a quick, visual means of determining whether air is flowing through the system as intended. LEV indicators can be fitted to ducting & enable readings to be taken without the ducting being taken apart: a visual inspection is easier and less time-consuming & invasive than gaining access to the LEV system.
How to Install an LEV Indicator
In order to install an LEV airflow indicator, you’ll need:
- A drill with drill bit (6mm)
- Screws
- The LEV indicator & tubing that come with the indicator
Before installing the LEV indicator, you’ll need to ensure that the duct has sufficient airflow. This information should be in your LEV report or provided by the LEV Engineer at the time of testing.
The installation process is as follows:
- Drill a small hole into the duct (using the 6mm drill bit). This will allow the LEV gauge to detect air flow. The tube that connects to the LEV indicator is inserted into this hole.
- Next, attach the LEV indicator to the duct using the self-drill screws.
- Attach the tubing to the duct & indicator. Ensure that the indication arrow is facing the right way (refer to the video at the top of the page if you’re unsure).
- When the LEV indicator attached, take the screen off. There’s a green sticker that can be fixed into the gauge. You can put the green indicator in to let you know the pressure in the duct
Further Information
If you have any queries about LEV Indicators, local exhaust ventilation systems, or LEV Testing, please do not hesitate to contact us on 01455 616 444. A member of our staff can help you with additional information according to your requirements.


- Ready To Talk?
-
Contact us for more information or to book an appointment.